# Network
University operated network services.
# VPN
Information on the university operated remote access VPN service.
# Connecting to VPN
Commonwealth University offers a VPN service using the Cisco Secure Client to facilitate remote access to on-campus resources.
Accessing the VPN from on-campus is not supported and will prevent you from accessing all network resources. You must disconnect the VPN to restore network access.
#### University Devices
University-managed devices are typically pre-configured with a special VPN profile. Once you launch the Cisco Secure Client, select "CU Managed VPN" from the dropdown and connect.
#### Other Devices
If you haven't connected to the university VPN before, you must first [download the Cisco Secure Client](https://kb.itd.commonwealthu.edu/books/network/page/download-cisco-secure-client).
- Launch Cisco Secure Client
- Select "Commonwealth University" from the dropdown, or enter "vpn.commonwealthu.edu" if you don't have that option.
- Select "Connect".
- Select the appropriate group (Usually "Faculty/Staff", the default).
- Enter your username and password, as you do when you log into your office computer.
- Enter your Duo Passcode (found in the Duo Mobile app) or leave the Duo field blank for an automatic Duo challenge (Duo Push or SMS). \[[Duo help](https://kb.itd.commonwealthu.edu/books/user-accounts/page/two-factor-authentication)\]
- Click OK.
# Download Cisco Secure Client
The Cisco Secure Client is required to connect to the university's VPN service.
Please select your computer's operating system to begin the client download:
- [Android](https://play.google.com/store/apps/details?id=com.cisco.anyconnect.vpn.android.avf)
- [Chromebook](https://chrome.google.com/webstore/detail/cisco-anyconnect/jacdijibdjifphcecdielmekkmfdpgee)
- [iPhone/iPad](https://apps.apple.com/us/app/cisco-anyconnect/id1135064690)
- [Linux](https://kb.itd.commonwealthu.edu/attachments/30) (64-bit only)
- [Linux on ARM64](https://kb.itd.commonwealthu.edu/attachments/31) (some tablets and low-powered computers, Raspberry Pi)
- [MacOS](https://kb.itd.commonwealthu.edu/attachments/34) (all)
- [Windows](https://kb.itd.commonwealthu.edu/attachments/32) (most computers)
- [Windows on ARM64](https://kb.itd.commonwealthu.edu/attachments/33) (some tablets and low-powered computers, Windows on Apple Silicon)
# Troubleshooting VPN
##### Error: Authentication failed
If you try logging in, but receive an error stating "Authentication failed" after about two minutes, it is probably because you didn't approve the Duo request.
After you log in, the Remote Access Service will contact Duo to see if you are authorized. This usually results in either a notification on your smart phone, or a text message (SMS), if you do not have a smart phone enrolled. You must respond to the notification or enter the SMS code before you can successfully log in.
Find out more on the [Duo two-factor authentication](https://kb.itd.commonwealthu.edu/books/user-accounts/page/two-factor-authentication) page.
##### Error: Connection attempt failed
If you are receiving an error stating "Connection attempt failed. Please try again." you may have a corrupt profile.
You may receive this error message if you attempt to use the Cisco Secure Client while at the Bloomsburg campus - this is normal. The Remote Access Service isn't available at the Bloomsburg campus, as it is not needed.
To fix this problem, follow these steps to replace your Cisco Secure Client profile with a known good version:
- Close Cisco Secure Client
- Reinstall the Commonwealth University profile:
- macOS:
- Press **command ⌘** + **spacebar**
- Type **terminal.app** and hit return
- Type (or copy/paste) this command, then press return to execute:
```
sudo rm -f /opt/cisco/anyconnect/profile/*.xml
```
- Enter your computer's password to confirm you want to run the command
- Type (or copy/paste) this command, then press return to execute:
```
sudo curl -o /opt/cisco/anyconnect/profile/Bloomsburg_University.xml https://kb.itd.commonwealthu.edu/attachments/5
```
- Close terminal
- Windows:
- Right click on this link: [Bloomsburg\_University.xml](https://kb.itd.commonwealthu.edu/attachments/5) and choose download or save
- Open File Explorer
- Open Downloads
- Right click on **Bloomsburg\_University.xml** in File Explorer
- Choose copy
- In the address bar, enter: **C:\\ProgramData\\Cisco\\Cisco AnyConnect Secure Mobility Client\\Profile**
- Delete any files of the type "XML Document", such as Default\_AC.xml and Bloomsburg\_University.xml (note: the .xml part of the filename may not be displayed, depending on your computer's settings)
- In the main pane, right click and choose paste (if prompted to replace, choose yes)
- Restart your computer
##### Last resort: Removing Cisco Secure Client
If all else fails, you may try uninstalling the Cisco Secure Client and removing associated program data. This usually isn't necessary, but may fix some problems.
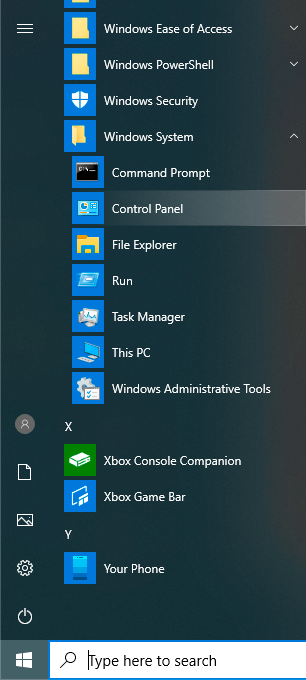
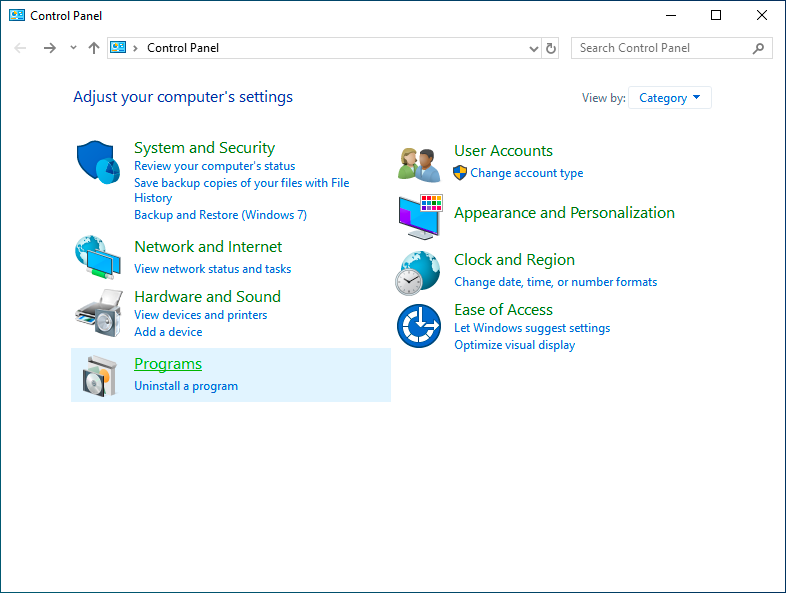
- Go to **Control Panel** > **Uninstall a program**
[](https://kb.itd.commonwealthu.edu/uploads/images/gallery/2023-11/1RuxKQhniUBynJW7-image.png)
[](https://kb.itd.commonwealthu.edu/uploads/images/gallery/2023-11/6nAmVPxhVwzv2NpM-image.png)
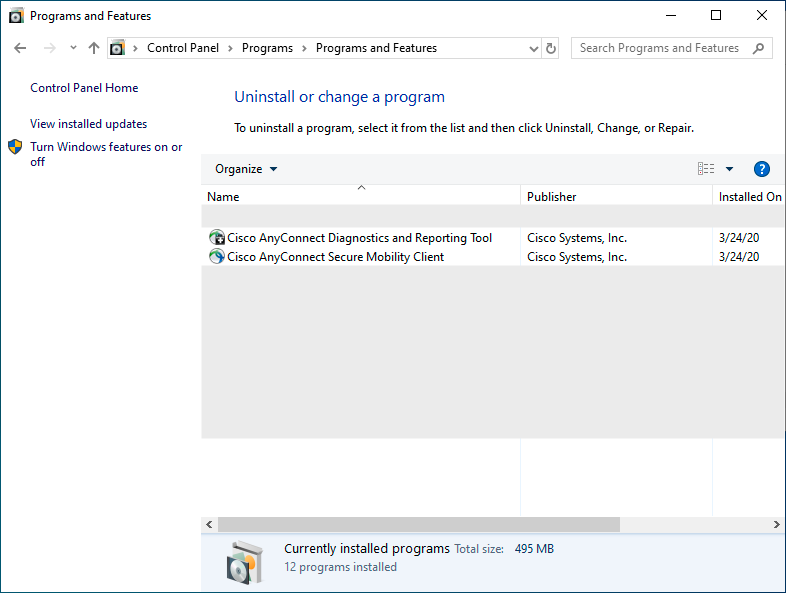
- Uninstall all **Cisco AnyConnect** applications
[](https://kb.itd.commonwealthu.edu/uploads/images/gallery/2023-11/qxyOkzr1bDFCRHPe-image.png)
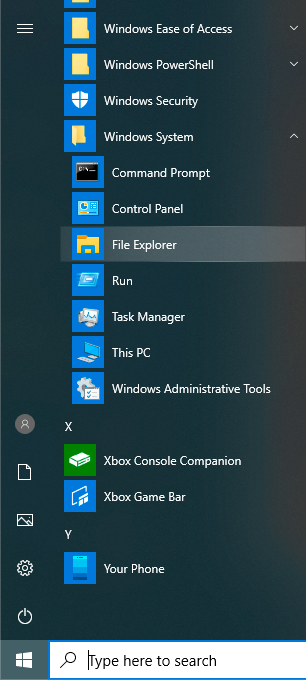
- Open **File Explorer**
[](https://kb.itd.commonwealthu.edu/uploads/images/gallery/2023-11/74UzvDg4saL7MT2h-image.png)
- In the address bar, enter: **C:\\ProgramData\\Cisco**
[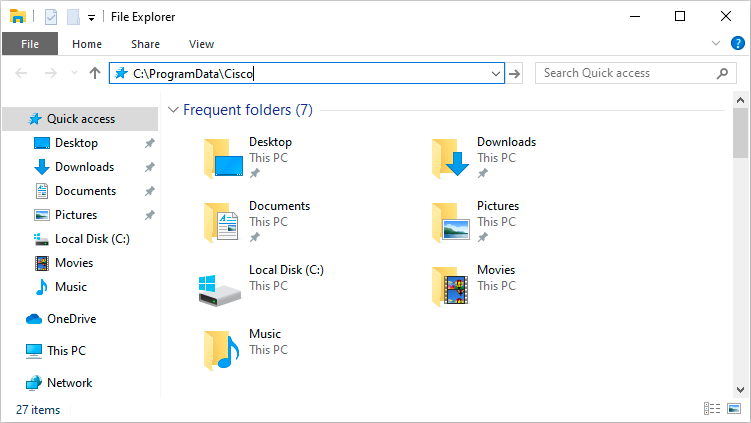](https://kb.itd.commonwealthu.edu/uploads/images/gallery/2023-11/hwegwxDVgdPp0wyH-image.png)
- Delete **Cisco AnyConnect Secure Mobility Client**
[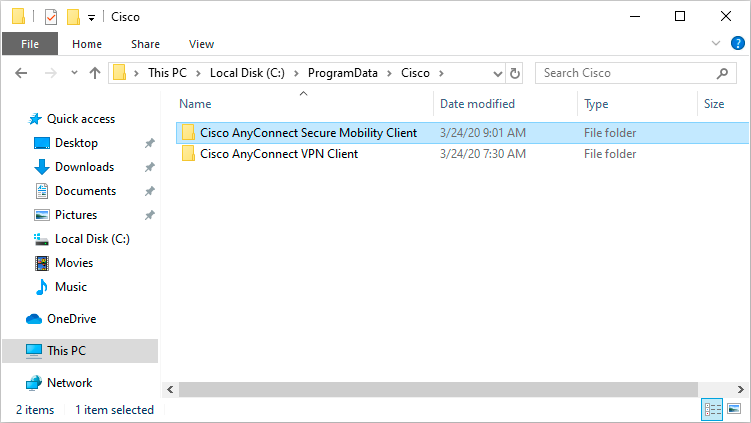](https://kb.itd.commonwealthu.edu/uploads/images/gallery/2023-11/1KYuPwTMmkjKyvSq-image.png)
- In the address bar, enter: **%USERPROFILE%\\AppData\\Local\\Cisco**
[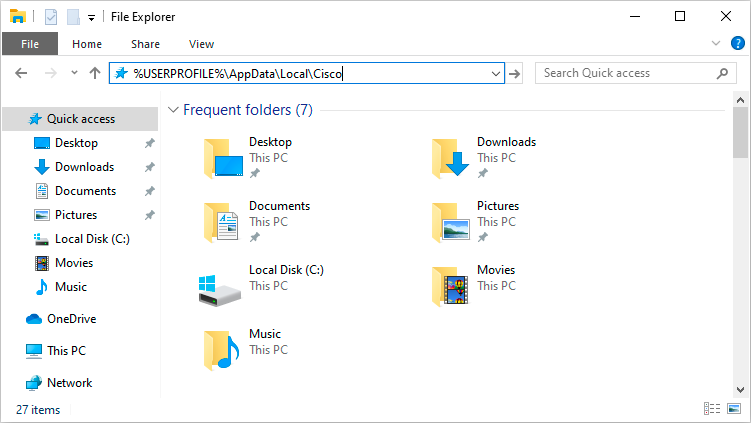](https://kb.itd.commonwealthu.edu/uploads/images/gallery/2023-11/IytlZpxHEiDg1V69-image.png)
- Delete **Cisco AnyConnect Secure Mobility Client**
[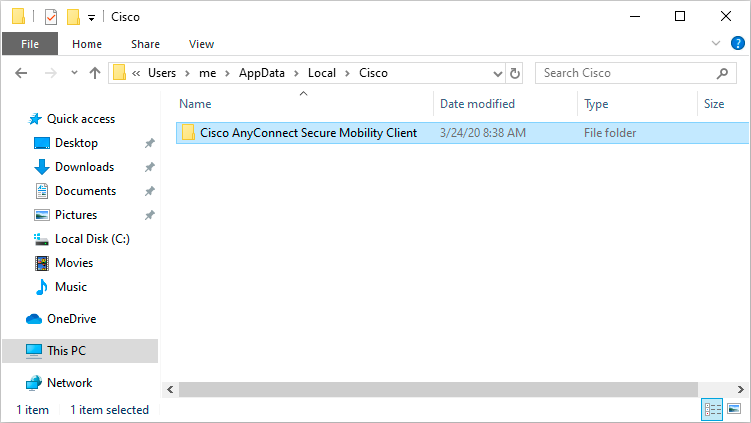](https://kb.itd.commonwealthu.edu/uploads/images/gallery/2023-11/8ZEMpQLHrc1YR5Jm-image.png)
- Restart your computer
- Follow the steps for [connecting](https://kb.itd.commonwealthu.edu/books/network/page/connecting-to-vpn) to the VPN
# Network Registration
Information on registering devices for network access.
# Device Registration
Before using the University Wi-Fi, personal devices must be registered. Once registered, devices will be authorized to connect to either:
- CU Registered Open
- CU Registered (an encrypted network with a unique, per-device password)
Devices registered using a CU account stay active for 9 months from their last use – after that, you'll need to register again.
### Getting Connected
Some devices use a random MAC address by default – you'll want to turn that off before registering! [Here's how](https://kb.itd.commonwealthu.edu/books/network/page/mac-address-randomization#bkmrk-we-have-step-by-step).
Check out the [locating your device's MAC address](https://kb.itd.commonwealthu.edu/books/network/page/locating-your-devices-mac-address) page for step-by-step instructions on connecting and registering common devices.
#### Devices with a web browser
*Computers, phones, and tablets*
- [Connect to **CU Registered Open**](https://kb.itd.commonwealthu.edu/books/network/chapter/wi-fi).
- Register your device — your MAC address will automatically be detected.
- If you don't automatically get prompted to register:
- *On Apple iOS Devices*: Make sure **auto-login** is **enabled** in CU Registered Open settings.
- Try forgetting the CU Registered Open network and setting it up again.
- Open a web browser and visit any website to manually initiate the registration process.
- Select which type of account you will be using to sign in
- If you have a CU or PASSHE account, you can register your device using it.
- Otherwise, you will need to request a guest account. Guest accounts are limited to fewer devices and a shorter duration of network access.
- Select **Register this device**
- Log in using your CU, PASSHE, or guest account
- Provide a **device nickname** that helps you know which device this is later
- *Optional:* Specify your own **Wi-Fi password** for this device
- *Optional:* Enter a **phone number** to receive a text message with your device registration information
- Review and accept the terms of use
- Click or tap **Create Device**
- Your device will briefly disconnect from the Wi-Fi. When it reconnects, you will have network access.
- *Optional*: [Connect to **CU Registered**](https://kb.itd.commonwealthu.edu/books/network/chapter/wi-fi) using the unique password that was generated for your device.
#### Devices without a web browser
*Gaming consoles, media players, and TVs*
- [Find your device’s MAC address](https://kb.itd.commonwealthu.edu/books/network/page/locating-your-devices-mac-address).
- Head to our [registration portal](https://netreg.commonwealthu.edu) on a different device.
- Log in using your CU, PASSHE, or guest account
- Under **Devices**, click **Create Device**
- Provide a **device nickname** that helps you know which device this is later
- *Optional:* Specify your own **Wi-Fi password** for this device
- *Optional:* Enter a **phone number** to receive a text message with your device registration information
- Review and accept the terms of use
- Click **Create Device**
- [Connect to Wi-Fi](https://kb.itd.commonwealthu.edu/books/network/chapter/wi-fi) — you’re good to go!
### Managing Devices
*Manage your devices at [netreg.commonwealthu.edu](https://netreg.commonwealthu.edu).*
View and manage your registered devices, update Wi-Fi passwords, and add or remove devices anytime. Log in with your CU, PASSHE, or guest account.
### Visiting campus?
No problem — guests can easily get online by registering for temporary access.
Here’s how it works:
- [Connect to **CU Registered Open**](https://kb.itd.commonwealthu.edu/books/network/chapter/wi-fi).
- When prompted, select **I am a guest**, then **request guest account**.
- Enter your name, email address, and mobile phone number.
- We’ll text you a temporary username and password.
- Follow the steps above to register your device.
- *Optional:* Check your email for a confirmation link, if you need guest access longer than 24 hours.
# Locating your device's MAC address
To register devices without a screen or web browser on the campus network, you’ll need their unique hardware ID, called a MAC address. Every device has one, and it’s usually listed in the network or Wi-Fi settings. Follow the steps below to locate it on your specific device.
#### eReaders
Amazon Kindle
##### Amazon Kindle
**E-Ink Version**
- Access the menu on your Kindle
- Select "Settings", then scroll down
- Document the "Wi-Fi MAC address", listed under "Device Info".
- [Register your device](https://kb.itd.commonwealthu.edu/books/network/page/device-registration#bkmrk-devices-without-a-we)
Microsoft Xbox (original)
##### Microsoft Xbox (original)
- Turn on your Xbox with no game disc in the disc tray
- From the Dashboard, select "Xbox Live"
- You should receive the following message: "Could not connect to Xbox Live. Do you want to troubleshoot your network connection?"
- From the "Connect Status" screen, select "Settings"
- Document the MAC address at the lower right corner of the "Network Settings" screen (the 12-digit hexadecimal value)
- [Register your device](https://kb.itd.commonwealthu.edu/books/network/page/device-registration#bkmrk-devices-without-a-we)
Microsoft Xbox 360
##### Microsoft Xbox 360
**NXE Dashboard**
- Go to "My Xbox" on the dashboard
- Select "System Settings"
- Select "Network Settings"
- Select the appropriate network. If you want to use both wired and wireless, each adapter uses a unique MAC address and both must be registered.
- Select "Configure Network"
- Select "Advanced Settings"
- Under "Additional Settings", select "Advanced Settings"
- Document the MAC address displayed at the bottom of the screen
- [Register your device](https://kb.itd.commonwealthu.edu/books/network/page/device-registration#bkmrk-devices-without-a-we)
**Original Dashboard**
- Go to the "System" area of the dashboard
- Select "Network Settings"
- Select the appropriate network. If you want to use both wired and wireless, each adapter uses a unique MAC address and both must be registered.
- Select "Edit Settings"
- Under "Additional Settings", select "Advanced Settings"
- Document the MAC address displayed at the bottom of the screen
- [Register your device](https://kb.itd.commonwealthu.edu/books/network/page/device-registration#bkmrk-devices-without-a-we)
Microsoft Xbox One
##### Microsoft Xbox One
The Xbox One initial setup will not complete successfully until you have full network access. You must register the device before this is possible. The initial setup must be completed with a wireless connection; it is not possible to obtain the wired MAC address during the initial setup.
If you have previously used your Xbox One, follow the instructions under "After Initial Setup".
**During Initial Setup (newer software)**
- Power on your new Xbox One
- Select your language
- Select your location
- Which one's yours?
- Select "CU Registered Open"
- Additional authentication needed
- Select "Authenticate now"
- Select "I have a CU account" using the left analog stick and "A" button
- Select "Register this device"
- Enter your CU username and password
- Enter a device name
- Select "Create Device"
- Wait for internet connection to be detected
- It's all good
- Select "Continue"
**During Initial Setup (older software)**
- Power on your new Xbox One
- Select your language
- Select your location
- Which one's yours?
- Select "Add wireless network"
- Enter the name (SSID) of your network
- Enter a non-existant network (random letters should work)
- What type of security is used for "\[previously entered SSID\]"?
- Select "None"
- Connecting to "\[previously entered SSID\]" wireless network...
- Checking your connection...
- Where's the Internet?
- Select "Let's fix it"
- Which network do you want to check?
- Select "Wireless"
- Change settings
- Select "Add wireless network"
- Change settings
Specify SSID
- Enter a non-existant network (you may use the same value as earlier)
- Change settings
Network "\[previously entered SSID\]" Security type
- Select "None"
- Connecting to "\[previously entered SSID\]" wireless network...
- Searching for solutions
- Can't connect to your wireless network
- Select "That didn't work"
- Document your console's wireless MAC address, displayed in the format of XX-XX-XX-XX-XX-XX
- [Register your device](https://kb.itd.commonwealthu.edu/books/network/page/device-registration#bkmrk-devices-without-a-we)
- Power your Xbox One off and on again to return to the beginning of the initial setup
**After Initial Setup (newer software)**
- Navigate to the "Settings" page
- Select "Network"
- Select "Network settings"
- Select "Set up wireless network"
- Which one's yours?
- Select "CU Registered Open"
- Additional authentication needed
- Select "Authenticate now"
- Select "I have a CU account" using the left analog stick and "A" button
- Select "Register this device"
- Enter your CU username and password
- Enter a device name
- Select "Create Device"
- Wait for internet connection to be detected
- It's all good
- Select "Continue"
**After Initial Setup (older software)**
- Navigate to the "Settings" page
- Select "Network"
- Select "Advanced Settings"
- Document the MAC address displayed at the right side of the screen
- [Register your device](https://kb.itd.commonwealthu.edu/books/network/page/device-registration#bkmrk-devices-without-a-we)
Microsoft Xbox Series S/X
##### Microsoft Xbox Series S/X
- Navigate to the "Settings" page
- Select "Network Settings"
- Select "Advanced Settings"
- Document the appropriate MAC address, depending on which connection type (wired or wireless) you plan to use. You must register both if you want to use both network adapters.
- [Register your device](https://kb.itd.commonwealthu.edu/books/network/page/device-registration#bkmrk-devices-without-a-we)
Nintendo DS
##### Nintendo DS
The Nintendo DS implementation of wireless is not compatible with modern high-speed wireless networks and is incompatible with the university network.
Nintendo 3DS
##### Nintendo 3DS
- From the Main Menu, highlight "System Settings" and tap "Open"
- Tap "Internet Settings"
- Tap "OK"
- Enter your PIN and tap "OK"
- Tap "Other Information"
- Tap "Confirm MAC Address"
- Document the MAC address
- [Register your device](https://kb.itd.commonwealthu.edu/books/network/page/device-registration#bkmrk-devices-without-a-we)
Nintendo Switch
##### Nintendo Switch
- From the Main Menu, select "System Settings"
- Scroll down and select "Internet"
- Document the MAC address
- [Register your device](https://kb.itd.commonwealthu.edu/books/network/page/device-registration#bkmrk-devices-without-a-we)
Nintendo Switch 2
##### Nintendo Switch 2
- From the Main Menu, select "System Settings"
- Scroll down and select "Internet"
- Document the MAC address
- [Register your device](https://kb.itd.commonwealthu.edu/books/network/page/device-registration#bkmrk-devices-without-a-we)
Nintendo Wii
##### Nintendo Wii
The Nintendo Wii's implementation of wireless is not compatible with modern high-speed wireless networks and is incompatible with the university network.
If you have a wired adapter for your Wii and have obtained an active network port in your room, you may register your Nintendo Wii.
- From the Wii Channel menu, select the "Wii Options" button (located on the lower left)
- Select "Wii Settings"
- Select "Internet"
- Select "Console Information"
- Document the "LAN Adapter MAC Address".
- Please note the "MAC address" is the wireless adapter and is not compatible with the campus network.
- If your "LAN Adapter MAC Address" is 00-00-00-00-00-00, you do not have the wired network adapter installed or it is not functioning properly.
- [Register your device](https://kb.itd.commonwealthu.edu/books/network/page/device-registration#bkmrk-devices-without-a-we)
Nintendo Wii U
##### Nintendo Wii U
- On your Wii U Gamepad, go to the Wii U Menu, and tap "System Settings"
- Tap "Internet"
- Tap "View MAC Address"
- Document the MAC address
- [Register your device](https://kb.itd.commonwealthu.edu/books/network/page/device-registration#bkmrk-devices-without-a-we)
Sony PlayStation 3
##### Sony PlayStation 3
- From the XrossMediaBar (XMB) menu, select "Settings" (located on the left)
- Select "Network Settings"
- Select "Settings and Connection Status List"
- Scroll down until the MAC address is visible
- Document the MAC address
- [Register your device](https://kb.itd.commonwealthu.edu/books/network/page/device-registration#bkmrk-devices-without-a-we)
Sony PlayStation 4
##### Sony PlayStation 4
- From the main menu, select "Settings" (located on the upper right)
- Select "Network"
- Select "View Connection Status"
- Scroll down until the MAC addresses are visible
- Document the appropriate MAC address, depending on which connection type (wired or wireless) you plan to use. You must register both if you want to use both network adapters.
- [Register your device](https://kb.itd.commonwealthu.edu/books/network/page/device-registration#bkmrk-devices-without-a-we)
Sony PlayStation 5
##### Sony PlayStation 5
- From the main menu, select "Settings" (located on the upper right)
- Select "Network"
- Select "Connection Status"
- Select "View Connection Status"
- Document the appropriate MAC address, depending on which connection type (wired or wireless) you plan to use. You must register both if you want to use both network adapters.
- [Register your device](https://kb.itd.commonwealthu.edu/books/network/page/device-registration#bkmrk-devices-without-a-we)
Sony PlayStation Portable (PSP)
##### Sony PlayStation Portable (PSP)
- Select System Settings
- Select System Information
- Document the MAC Address
- [Register your device](https://kb.itd.commonwealthu.edu/books/network/page/device-registration#bkmrk-devices-without-a-we)
Sony PlayStation Vita
##### Sony PlayStation Vita
- Select the "Settings" bubble from the main menu
- Scroll down near the bottom of the Settings menu and select "System"
- Select "System Information"
- Document the MAC address
- [Register your device](https://kb.itd.commonwealthu.edu/books/network/page/device-registration#bkmrk-devices-without-a-we)
Steam Deck
##### Stream Deck
- Go to Settings
- Select "Internet"
- Select "Info"
- Document the MAC address
- [Register your device](https://kb.itd.commonwealthu.edu/books/network/page/device-registration#bkmrk-devices-without-a-we)
Amazon Fire TV
##### Amazon Fire TV
**During Initial Setup**
- On the "Connect to your network" screen, both MAC addresses will be displayed in the last box to the right
- Document the appropriate MAC address, depending on which connection type (wired or wireless) you plan to use. You must register both if you want to use both network adapters.
- [Register your device](https://kb.itd.commonwealthu.edu/books/network/page/device-registration#bkmrk-devices-without-a-we)
**After Initial Setup**
- From the main menu, select "Settings"
- Select "System" (last option to the right)
- Select "About"
- Select "Network"
- Document the appropriate MAC address, depending on which connection type (wired or wireless) you plan to use. You must register both if you want to use both network adapters.
- [Register your device](https://kb.itd.commonwealthu.edu/books/network/page/device-registration#bkmrk-devices-without-a-we)
Apple TV
##### Apple TV
**During Initial Setup**
It is not possible to retrieve the MAC address during the initial setup. Press the "Menu" button on the remote control to skip the initial setup.
**After Initial Setup**
- From the home screen, select "Settings"
- Select "General"
- Select "About"
- Document the appropriate MAC address, depending on which connection type (wired or wireless) you plan to use. You must register both if you want to use both network adapters.
- If you do not have the wired adapter connected, the wireless MAC address will be displayed as "Wi-Fi Address".
- If the wired adapter has a network connection, the display will change to show the wired MAC address as "Ethernet Address".
- [Register your device](https://kb.itd.commonwealthu.edu/books/network/page/device-registration#bkmrk-devices-without-a-we)
Roku
##### Roku
The following procedure may be completed either during or after the initial setup.
- Press the following button sequence on your remote control:
- Home 5 times
- ▶▶ (FF) 3 times
- ◀◀ (RW) 2 times
- Document the appropriate MAC address, depending on which connection type (wired or wireless) you plan to use. You must register both if you want to use both network adapters.
- Select "Back" or "Cancel" to return
- [Register your device](https://kb.itd.commonwealthu.edu/books/network/page/device-registration#bkmrk-devices-without-a-we)
Smart TVs
##### Smart TVs
Most Smart TVs are compatible with the university network. You will need to obtain the MAC address from your TV prior to registering.
A MAC address consists of letters (A-F) and numbers (0-9), typically in one of the following formats: XX-XX-XX-XX-XX-XX or XX:XX:XX:XX:XX:XX.
Due to differences between each TV and the variety of models being used, it is not possible to maintain accurate instructions for every TV. The MAC address should be noted in your TV's settings menu or printed on the rear of the TV.
*Tip: You may be able to find specific instructions for your TV by searching the internet for "MAC address" with the model number.*
Amazon Echo
##### Amazon Echo
- Download the **Amazon Alexa** app to a phone or computer
- Sign in with your Amazon Account
- Connect to the wireless network transmitted by the Echo device
- Document the MAC address at the bottom of the Echo Setup screen
- [Register your device](https://kb.itd.commonwealthu.edu/books/network/page/device-registration#bkmrk-devices-without-a-we)
Google Home
##### Google Home
- Download the **Google Home** app on your phone or tablet
- Select your Google Home from the list of nearby devices and press **Set Up**
- Accept the prompt to allow your phone to connect to the Google Home
- Enter the location of your Google Home and press **Continue**
- Document the MAC address at the bottom right corner of the screen
- [Register your device](https://kb.itd.commonwealthu.edu/books/network/page/device-registration#bkmrk-devices-without-a-we)
Hatch Alarm Clock
##### Hatch Alarm Clock
Hatch only supports password protected Wi-Fi and must be used with **CU Registered**
- Contact [**Hatch Support**](https://www.hatch.co/contact) for your device's MAC address
- Once they have provided the MAC address, you may [register your device](https://kb.itd.commonwealthu.edu/books/network/page/device-registration#bkmrk-devices-without-a-we)
Samsung Galaxy Watch
##### Samsung Galaxy Watch
- Open the **Settings** app
- Navigate to **About Watch** > **Status Information**
- Document the MAC address from **Wi-Fi MAC Address**
- [Register your device](https://kb.itd.commonwealthu.edu/books/network/page/device-registration#bkmrk-devices-without-a-we)
- Return to the **Settings** app
- Navigate to **Connections** > **Wi-Fi**
- Select **CU Registered Open** or **CU Registered**
- Select **Advanced**
- Disable **Randomized MAC**
- If you are using **CU Registered**, go back and enter your device's unique Wi-Fi password
- Connect to the network
Apple iPhone/iPad (iOS)
##### Apple iPhone/iPad (iOS)
This setting only applies to the individual Wi-Fi network where you change it. If you intend on using **CU Registered** after registering your device using **CU Registered Open**, you must complete these steps again when switching networks.
- Go to **Wi-Fi** settings
- Tap the blue information icon next to **CU Registered Open** or **CU Registered**
- Change **Private Wi-Fi Address** to **Off**
Apple Mac (macOS)
##### Apple Mac (macOS)
This setting only applies to the individual Wi-Fi network where you change it. If you intend on using **CU Registered** after registering your device using **CU Registered Open**, you must complete these steps again when switching networks.
**Sequoia and newer**
- Click the **Apple** menu
- Select **System Settings**
- Select **Wi-Fi** from the sidebar
- Click the **three dots** next to **CU Registered Open** or **CU Registered**
- Select **Network Settings**
- Change **Private Wi-Fi Address** to **Off**
Apple Watch
##### Apple Watch
This setting only applies to the individual Wi-Fi network where you change it. If you intend on using **CU Registered** after registering your device using **CU Registered Open**, you must complete these steps again when switching networks.
- Go to **Wi-Fi** settings
- Tap **CU Registered Open** or **CU Registered**
- Change **Private Address** to **Off**
Google Pixel (Android)
##### Google Pixel (Android)
This setting only applies to the individual Wi-Fi network where you change it. If you intend on using **CU Registered** after registering your device using **CU Registered Open**, you must complete these steps again when switching networks.
- Pull down the notification area
- Long press **Internet**
- If there is a gear next to **CU Registered Open** or **CU Registered:**
- Tap the gear
- If not:
- Long-press **CU Registered Open** or **CU Registered**
- Select **Modify**
- Tap **Advanced options**
- Under **Privacy**, select **Use device MAC**
Samsung Galaxy Phone/Tablet (Android)
##### Samsung Galaxy Phone/Tablet (Android)
This setting only applies to the individual Wi-Fi network where you change it. If you intend on using **CU Registered** after registering your device using **CU Registered Open**, you must complete these steps again when switching networks.
- Pull down the notification area
- Long press **Wi-Fi**
- Tap **Details**
- Tap the gear next to **CU Registered Open** or **CU Registered**
- Tap **View More**
- Select **MAC Address Type**, then choose **Phone MAC**, **Tablet MAC**, or **Device MAC**
Samsung Galaxy Watch
##### Samsung Galaxy Watch
This setting only applies to the individual Wi-Fi network where you change it. If you intend on using **CU Registered** after registering your device using **CU Registered Open**, you must complete these steps again when switching networks.
- Open the **Settings** app
- Navigate to **Connections** > **Wi-Fi**
- Select **CU Registered Open** or **CU Registered**
- Select **Advanced**
- Disable **Randomized MAC**
Windows
##### Windows
This setting only applies to the individual Wi-Fi network where you change it. If you intend on using **CU Registered** after registering your device using **CU Registered Open**, you must complete these steps again when switching networks.
- Click the **Start** button
- Navigate to **Settings** > **Network & Internet** > **Wi-Fi**
- Click **Manage known networks**
- Select **CU Registered Open** or **CU Registered**
- Change **Random hardware addresses** to **Off**
You may need to [disable MAC address randomization](https://kb.itd.commonwealthu.edu/books/network/page/mac-address-randomization) on devices before connecting to **CU Registered** or **CU Registered Open**.
### Networks
#### CommonwealthU
This is the preferred wireless network for personal phones, tablets, and computers belonging to faculty, staff, and students.
Connect to this network using your CU username and password. This network provides an encrypted wireless connection.
If you are prompted for network settings while connecting, here's what you need to know:
- Security type: **WPA3 Enterprise** (preferred) or **WPA2 Enterprise** (supported)
- Encryption type: **AES**
- Mode: **Automatic**
- EAP method: **PEAP**
- Phase 2 authentication: **MSCHAPv2**
- Trusted root certificate authority: **Sectigo Public Server Authentication Root R46**
- Server name: **commonwealthu.edu**
- CA certificate: **Use system certificates**
- Domain: **commonwealthu.edu**
- Username or Identity: Your full **CU account username**, such as **flast@commonwealthu.edu** or **abc12345@commonwealthu.edu
- Anonymous identity: *(leave blank)*
- Password: Your **CU account password**
#### CU Registered Open
This wireless network is available for personal devices belonging to faculty, staff, students, and guests.
Game consoles, streaming devices, and smart TVs must be [manually registered](https://kb.itd.commonwealthu.edu/books/network/page/device-registration#bkmrk-devices-without-a-we) before connecting to this network.
Computers, phones, and tablets should automatically begin the registration process upon connecting to this network for the first time. If registration does not begin automatically, open a web browser and visit any website to initiate the process.
#### CU Registered
Devices must be [registered](https://kb.itd.commonwealthu.edu/books/network/page/device-registration) before connecting to this network.
This wireless network is available for personal devices belonging to faculty, staff, students, and guests. It provides an encrypted wireless connection for devices that do not support username/password wireless authentication.
Each device must be individually registered before using this network. During registration, a unique password will be assigned to each device that must be provided when connecting. It is not possible to connect to this network using your CU account password.
#### CU Managed
The **CU Managed** network will not work on personal devices.
All University-managed devices are automatically configured to connect to this wireless network. It is not necessary to manually configure university-managed devices, and doing so may cause problems.
# Connecting to Wi-Fi
Most devices can be connected with just a few quick steps. For some common devices, we’ve provided complete beginning-to-end instructions below. Follow the guide that matches your device to make sure it connects smoothly to the campus network.
#### Computers
Apple Mac (macOS)
##### Apple Mac
- Go to **Wi-Fi** settings
- Move your mouse over **CommonwealthU** and click **Connect**
- Leave **Identity** set to **None**
- Log in using your **CU account**
- If you are prompted to verify a certificate, confirm it is for the server **commonwealthu.edu** and click **Continue**
- Enter your computer password to store the certificate. If you skip this step, you will be prompted to verify the certificate next time you connect.
Windows
##### Windows 11
- Click the **Start** button
- Navigate to **Settings** > **Network & Internet** > **Wi-Fi**
- Expand **Show available networks**
- Select **CommonwealthU**
- Check **Connect automatically**
- Click **Connect**
- Log in using your **CU account**
- Click **OK**
- If you are prompted to verify a certificate, confirm it is for the server **commonwealthu.edu** and click **Connect**
Apple iPhone/iPad (iOS)
##### Apple iPhone/iPad (iOS)
- Go to **Wi-Fi** settings
- Tap **CommonwealthU**
- Log in using your **CU account**
- Tap the **checkmark**
- If you are prompted to verify a certificate, confirm it is for the server **commonwealthu.edu** and tap **Trust**
Google Pixel (Android)
##### Google Pixel (Android)
- Pull down the notification area
- Long press **Internet**
- Tap **CommonwealthU**
- Configure as follows:
- EAP method: **PEAP**
- Phase 2 authentication: **MSCHAPv2**
- CA certificate: **Use system certificates**
- Domain: **commonwealthu.edu**
- Identity: your **CU username**
- Password: your **CU password**
- Tap **Connect**
Samsung Galaxy (Android)
##### Samsung Galaxy (Android)
**Registering your device**
- Pull down the notification area
- Long press **Wi-Fi**
- Tap **Details**
- Tap **CommonwealthU**
- Configured as follows:
- EAP method: **PEAP**
- Phase 2 authentication: **MSCHAPv2**
- CA certificate: **Use system certificates**
- Domain: **commonwealthu.edu**
- Identity: your **CU username**
- Password: your **CU password**
- Tap **Connect**
When possible, use wired peripherals or turn off unnecessary wireless devices near your computer.
#### **Device Hardware and Placement**
Not all Wi-Fi adapters perform equally. Performance can be affected by:
- **Older adapters** that only support 2.4 GHz or earlier standards like 802.11n
- **Weak antennas** or adapters embedded behind metal cases or desks
- **Adapters without cradles**, which are limited by their position and can’t be moved for better signal
We recommend using a **Wi-Fi 6 (802.11ax)** adapter with a **desktop cradle and larger antenna**. These models can be placed away from your computer, improving reception and stability.
#### **Environmental Factors**
Wi-Fi signals can be absorbed or reflected by:
- Metal surfaces and filing cabinets
- Concrete walls
- Water (including aquariums and people)
Repositioning your device or adapter just a few feet can make a noticeable difference.
# Prohibited Wireless Devices
To ensure stable, high-performance Wi-Fi across campus, certain types of devices are **not permitted**. These devices interfere with campus Wi-Fi operations and can cause widespread performance issues for nearby users.
#### **Prohibited Device Types**
| Category | Examples |
|---|
| **Personal routers and access points** | Home Wi-Fi routers, mesh nodes, “travel” routers, wireless printers acting as access points |
| **Mobile hotspots and tethering** | Phone or tablet hotspot mode, dedicated hotspot devices (e.g., Verizon Jetpack, Nighthawk M1) |
| **Wi-Fi extenders and repeaters** | Range extenders, signal boosters, wireless bridges |
| **Ad-hoc or peer-to-peer networks** | Computer-to-computer (ad-hoc) Wi-Fi setups |
Apple Devices
#### Apple Devices
##### Not Prompted to Register
If you don't automatically get prompted to register your device when connecting to **CU Registered Open** for the first time:
- Make sure **auto-login** is **enabled** in CU Registered Open settings.
- If you do not have an option for auto-login, try forgetting the CU Registered Open network and setting it up again.
- *As a last resort*: Open a web browser and visit any website to manually initiate the registration process.
##### Repeatedly Prompted for Wi-Fi Password
Apple devices that are signed into the same iCloud account will sync the Wi-Fi password for **CU Registered** to all other devices. To avoid issues, you must specify the same password on all Apple devices during registration.
Once you encounter this problem, it may be necessary to forget the network on all devices and delete the Wi-Fi password from your iCloud account.
To forget the Wi-Fi network:
- Go to **Wi-Fi** settings
- Click the three dots or tap the blue information icon next to **CU Registered**
- Select **Forget This Network**
- Repeat this procedure on all Apple devices
Next, on an Apple Mac:
- Click the **magnifying glass** 🔍 near the upper right corner
- Type **Keychain Access** and press **enter**
- Search for **CU Registered**
- Select the first item, then press the **delete** key
[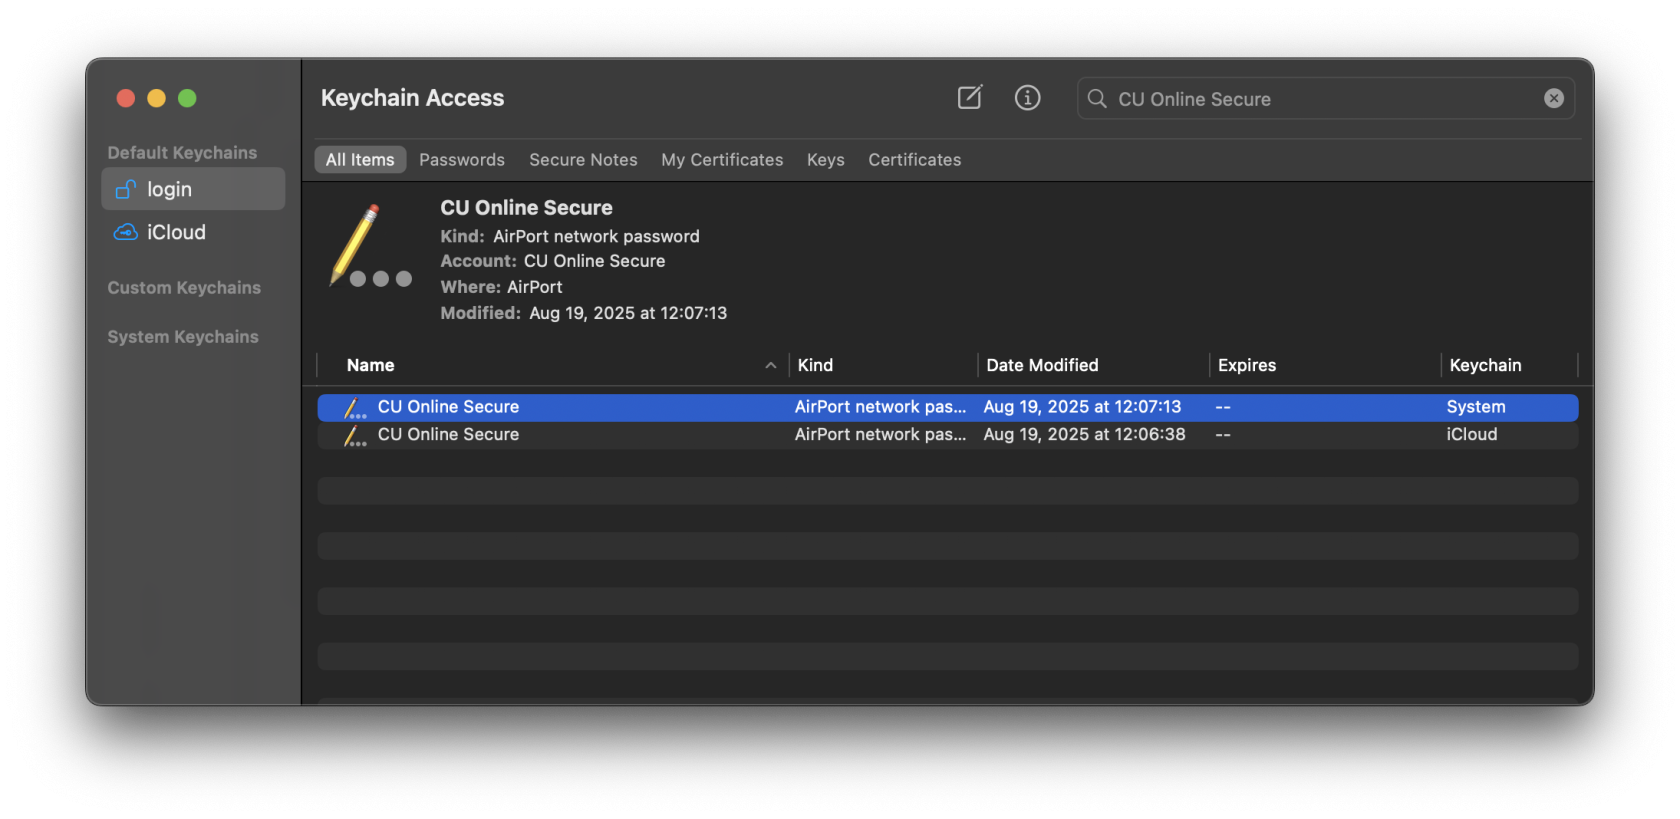](https://kb.itd.commonwealthu.edu/uploads/images/gallery/2025-09/DQcVaT5TrcVXGRKn-image.png)
- It may be necessary to enter your computer password to confirm this change
- If there are multiple entries, delete them all
Once you have forgotten the network on all devices and removed it from your iCloud keychain, make sure you have the same password set for all devices using the Network Registration portal at [https://netreg.commonwealthu.edu](https://netreg.commonwealthu.edu). Now you can set up **CU Registered** again on your devices using the following instructions:
- [Apple Mac](https://kb.itd.commonwealthu.edu/books/network/page/locating-your-devices-mac-address#bkmrk-macos)
- [Apple iPhone/iPad](https://kb.itd.commonwealthu.edu/books/network/page/locating-your-devices-mac-address#bkmrk-apple-ios)
Don't forget to [turn off Private Wi-Fi address](https://kb.itd.commonwealthu.edu/books/network/page/mac-address-randomization) when you connect to **CU Registered** again.
Sony PlayStation
#### Sony PlayStation
Sony PlayStations sometimes get confused by the optional encryption on the **CU Registered Open** Wi-Fi network. The easiest way to resolve this issue is to use **CU Registered**. If you would like to use **CU Registered Open**, it is still possible to connect, but requires a few extra steps.
If you are encountering this problem, you will see a lock icon on the **CU Registered Open** network and be prompted for a password if you select it.
[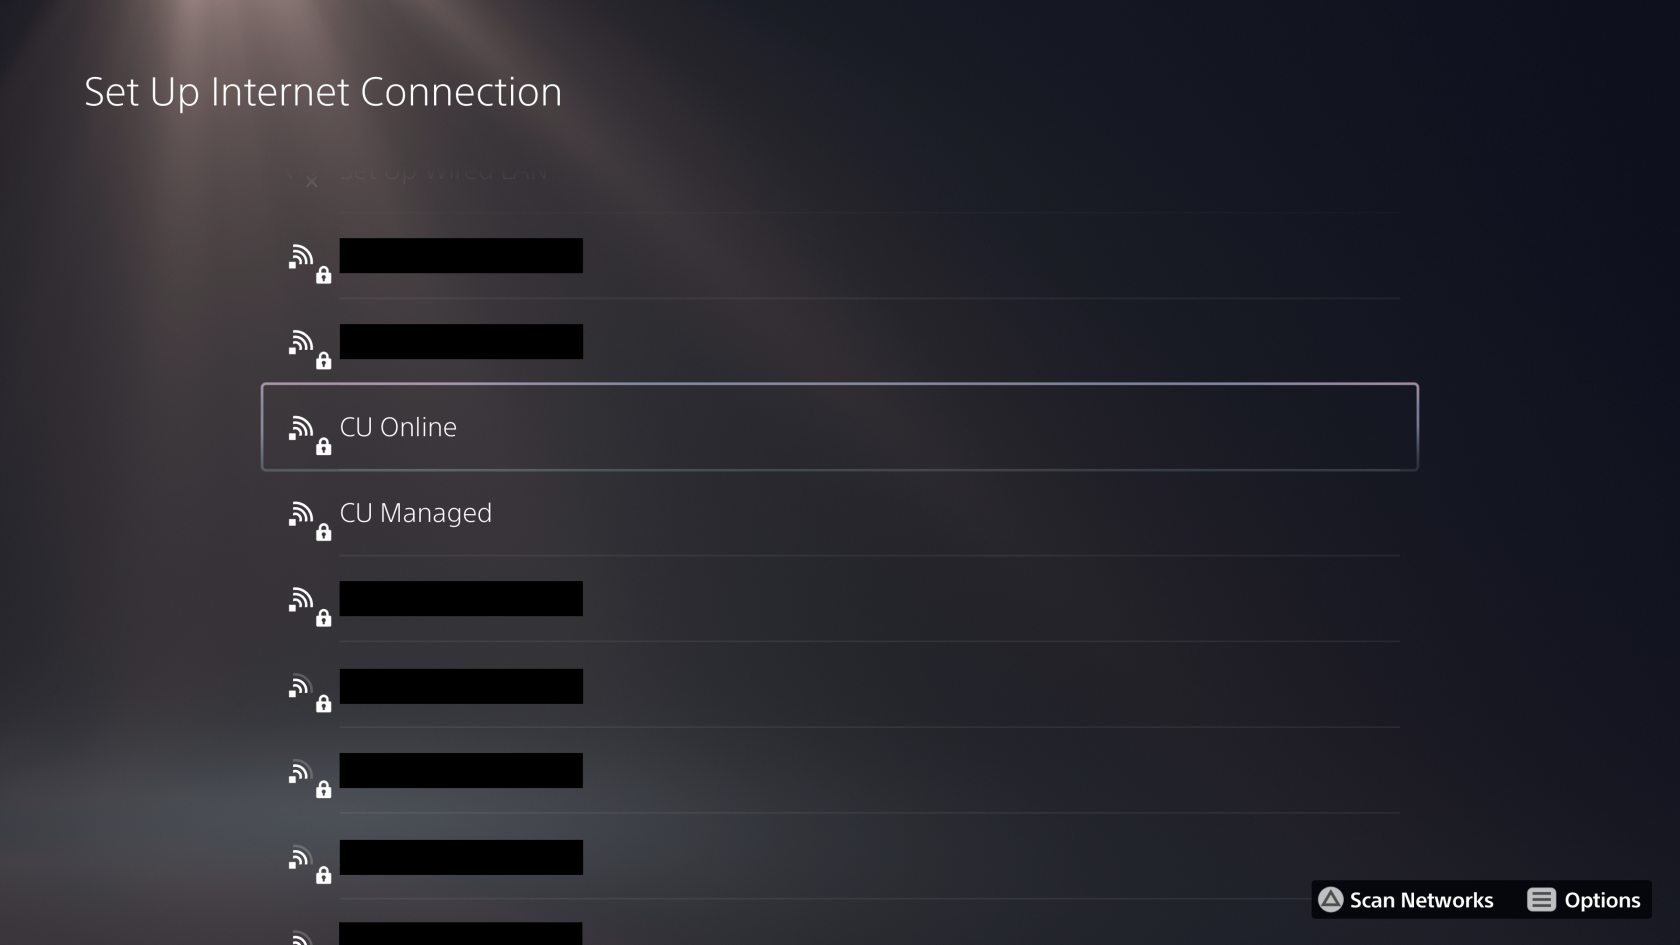](https://kb.itd.commonwealthu.edu/uploads/images/gallery/2024-08/OUsBJFAZ6qqNGkxU-image.png)
[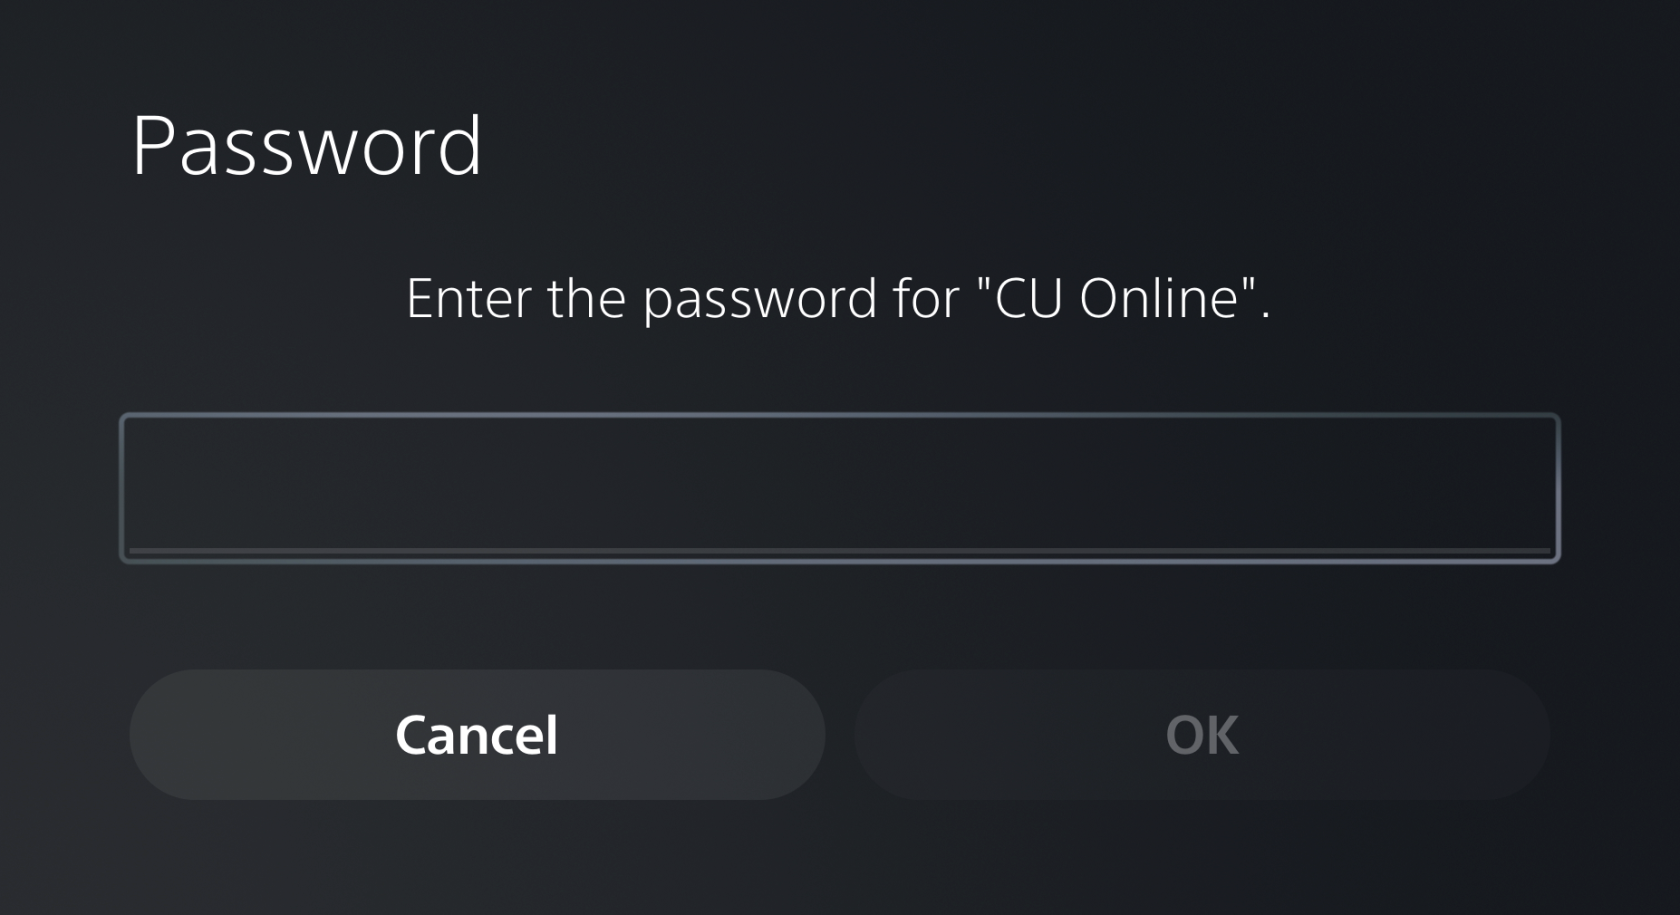](https://kb.itd.commonwealthu.edu/uploads/images/gallery/2024-08/ntXUVY2QmK9cL9j9-image.png)
If this occurs, press  to re-scan Wi-Fi networks until the lock disappears:
[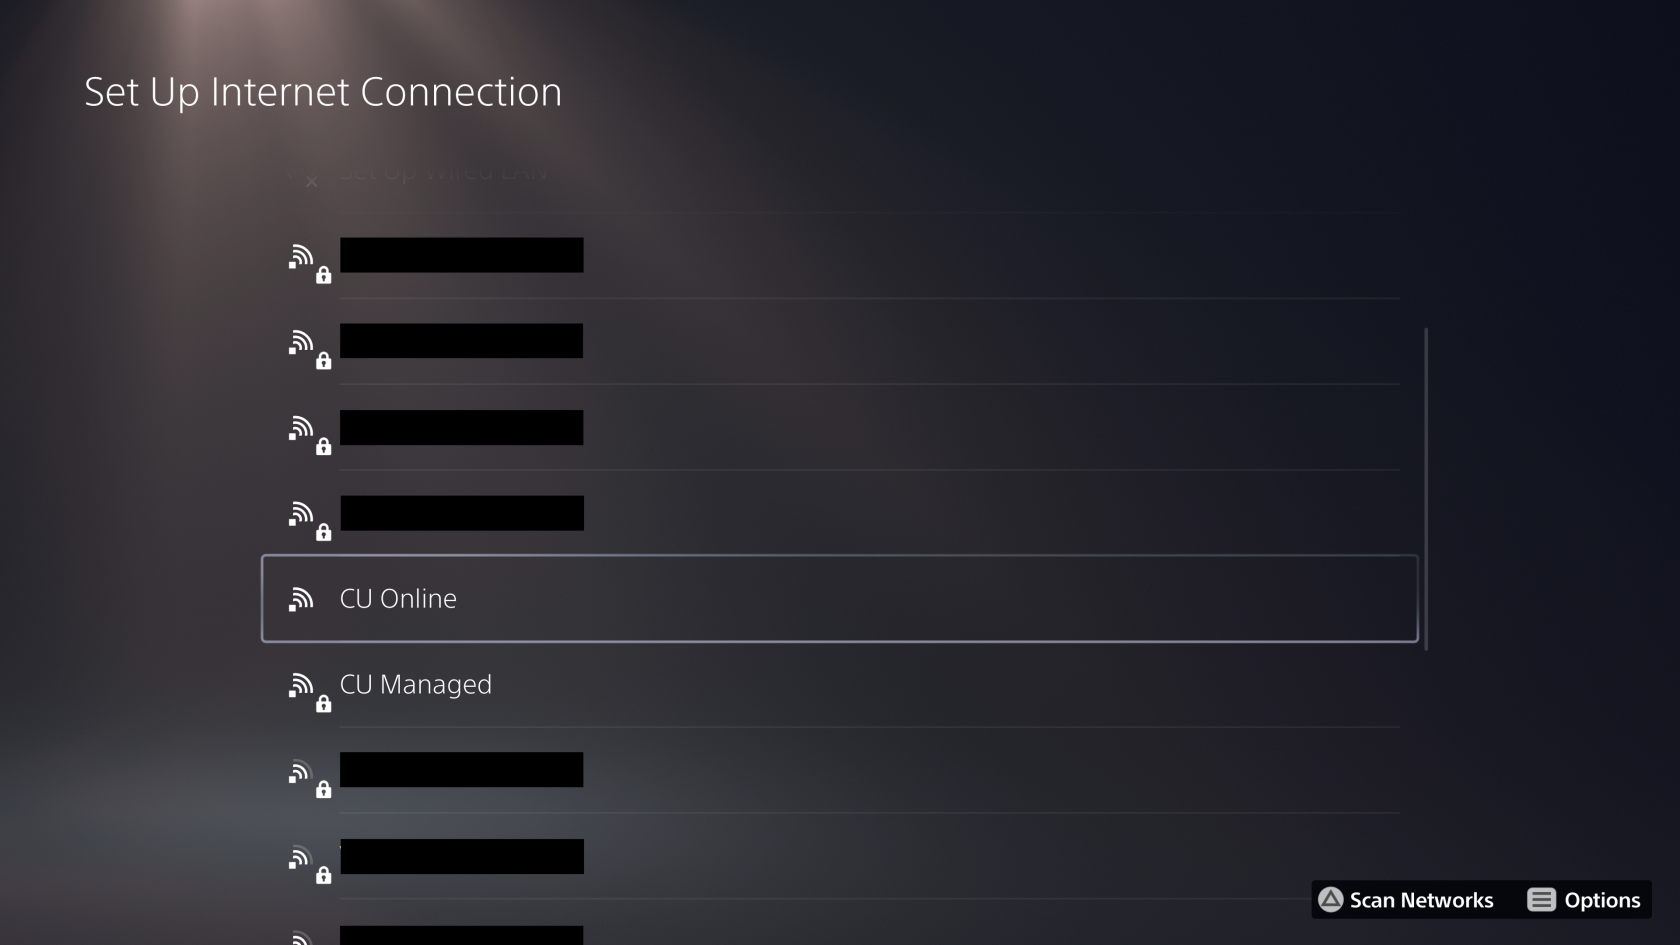](https://kb.itd.commonwealthu.edu/uploads/images/gallery/2024-08/S7sarbJhfNSFTW93-image.png)
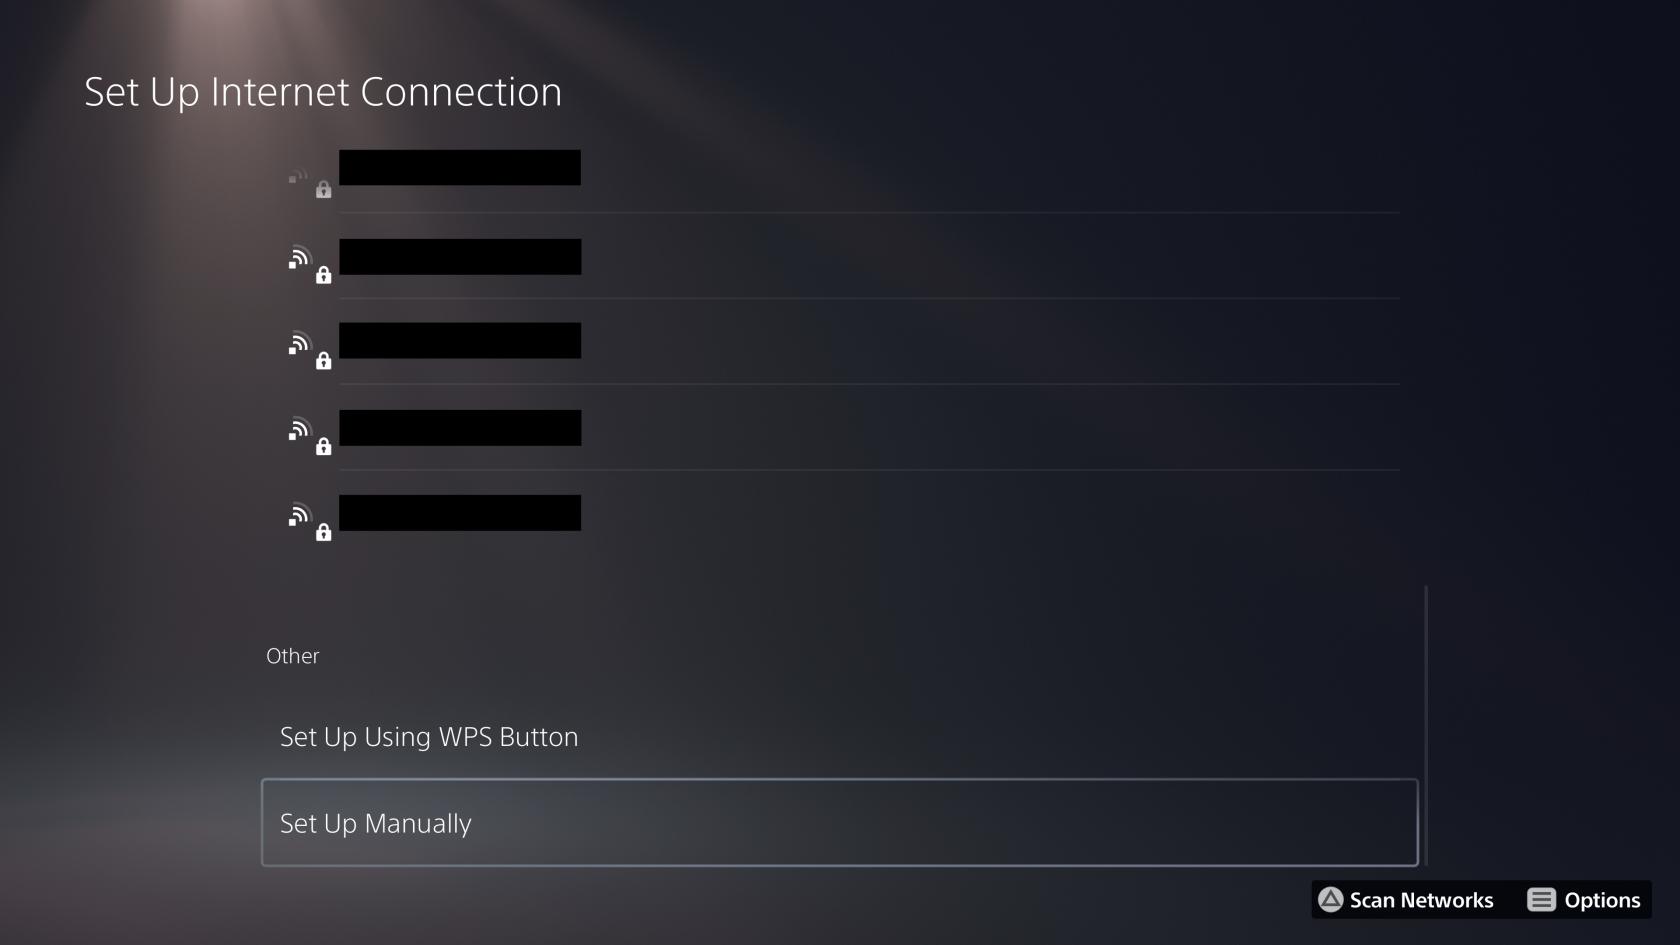
You can also work around this problem by manually configuring the Wi-Fi network on your PlayStation:
1. Select "Set Up Manually"
[](https://kb.itd.commonwealthu.edu/uploads/images/gallery/2024-08/LTDFLx3Veu4mrz4X-image.png)
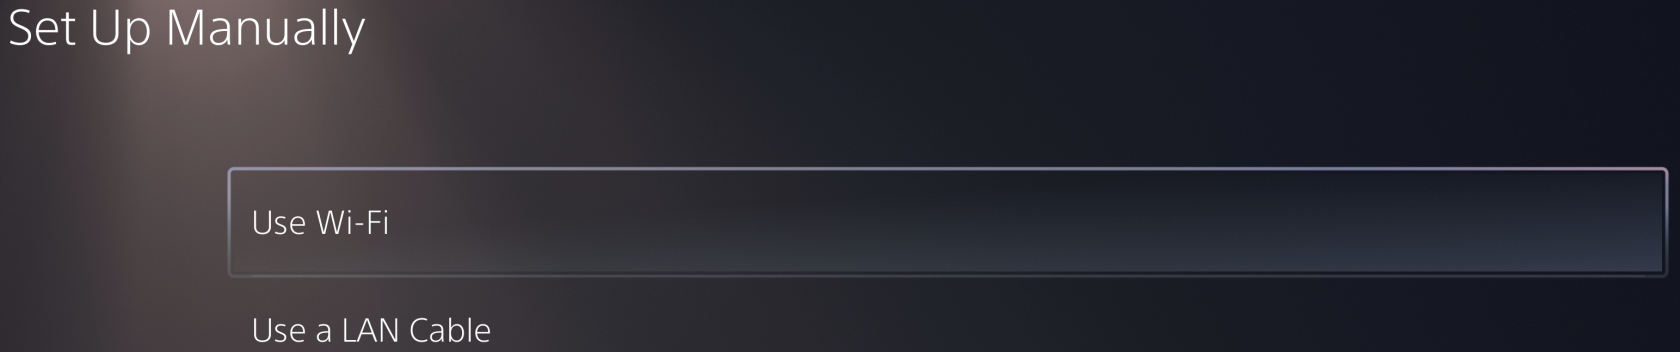
2. Select "Use Wi-Fi"
[](https://kb.itd.commonwealthu.edu/uploads/images/gallery/2024-08/tI7jaF3DD2UaVdtK-image.png)
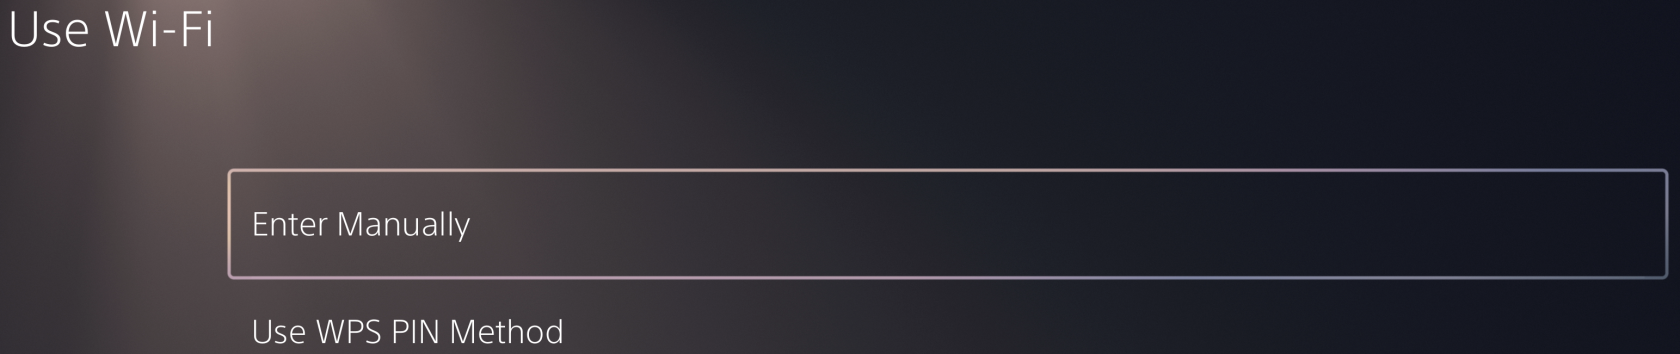
3. Select "Enter Manually"
[](https://kb.itd.commonwealthu.edu/uploads/images/gallery/2024-08/z4VwjGbqC4bN274q-image.png)
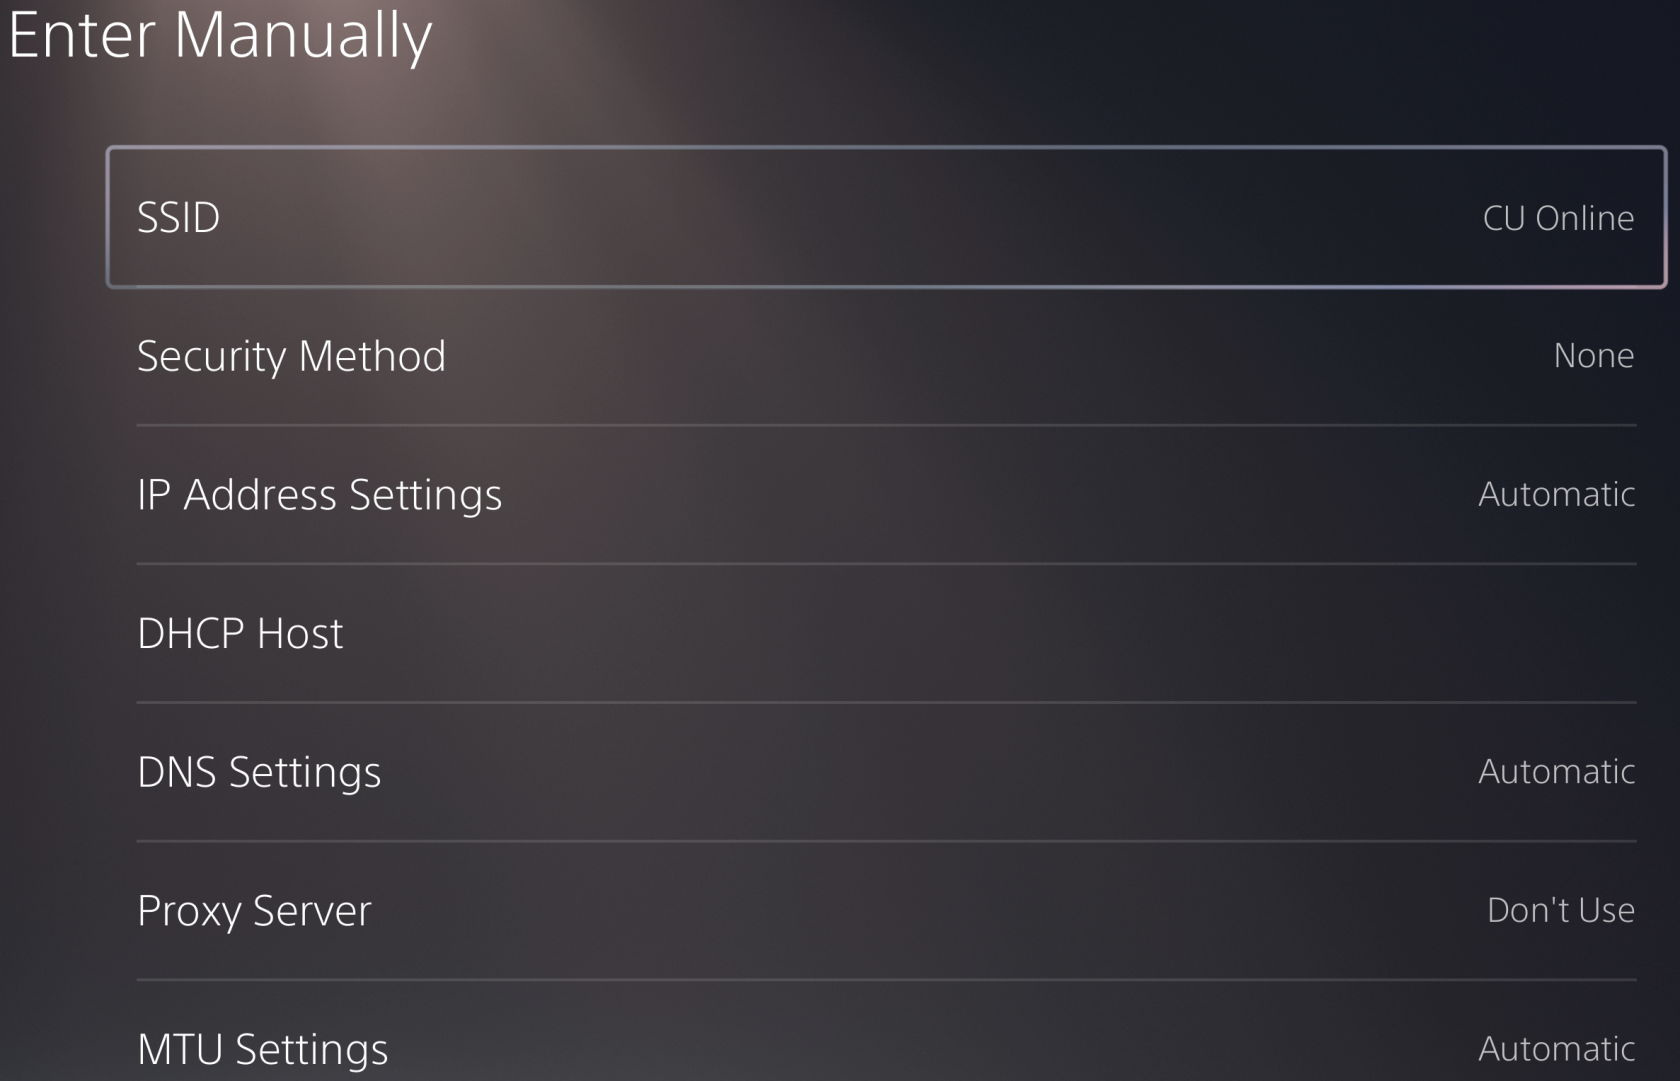
4. Enter **CU Registered Open** for SSID and leave all other settings at the default value.
[](https://kb.itd.commonwealthu.edu/uploads/images/gallery/2024-08/l8yzfDCivV8MgBLQ-image.png)
5. Select "Done"
Vizio TVs
#### Vizio TVs
Some Vizio TVs get confused by the optional encryption on the **CU Registered Open** Wi-Fi network. The easiest way to resolve this issue is to use **CU Registered**. If you would like to use **CU Registered Open**, it is still possible to connect, but requires a few extra steps.
If you are encountering this problem, you will not see **CU Registered Open** in the list of Wi-Fi networks.
To connect, you will need to select the "Hidden Network" option and enter **CU Registered Open** as the Access Point Name.